Quick, repeatable setups, precision boring, and affordability make concealed-hinge installation jigs a must-have tool for home workshop cabinetmakers.
Wood Magazine
Simply clamp and drill to mount a hinge
Concealed hinges, also known as Euro-style or cup hinges, work great for cabinetry projects because they easily adjust for perfect-fitting doors and come in a variety of styles for both face-frame and frameless cabinets. As the name implies, they’re hidden from view, mounting to the inside face of the door with a cup that fits into a 35mm hole. Screws flanking the cup hole secure the hinge, right.
Drilling the cup hole traditionally required using a drill press with fence stops to ensure the accuracy required for proper hinge positioning. Hinge-installation jigs allow you to skip the drill press setup and bore the cup and mounting-screw holes precisely using only a hand drill.
We wanted to put a few of these jigs to the test to see if they could deliver on their promise of precise, clean drilling. An internet search turned up dozens of jigs, but we stuck with familiar brands (Rockler, Kreg, Milescraft). We also ordered one (Veiko) that’s a big seller on amazon.com. The jigs all come with the 35mm bit, except the Rockler, which sells the bit separately.
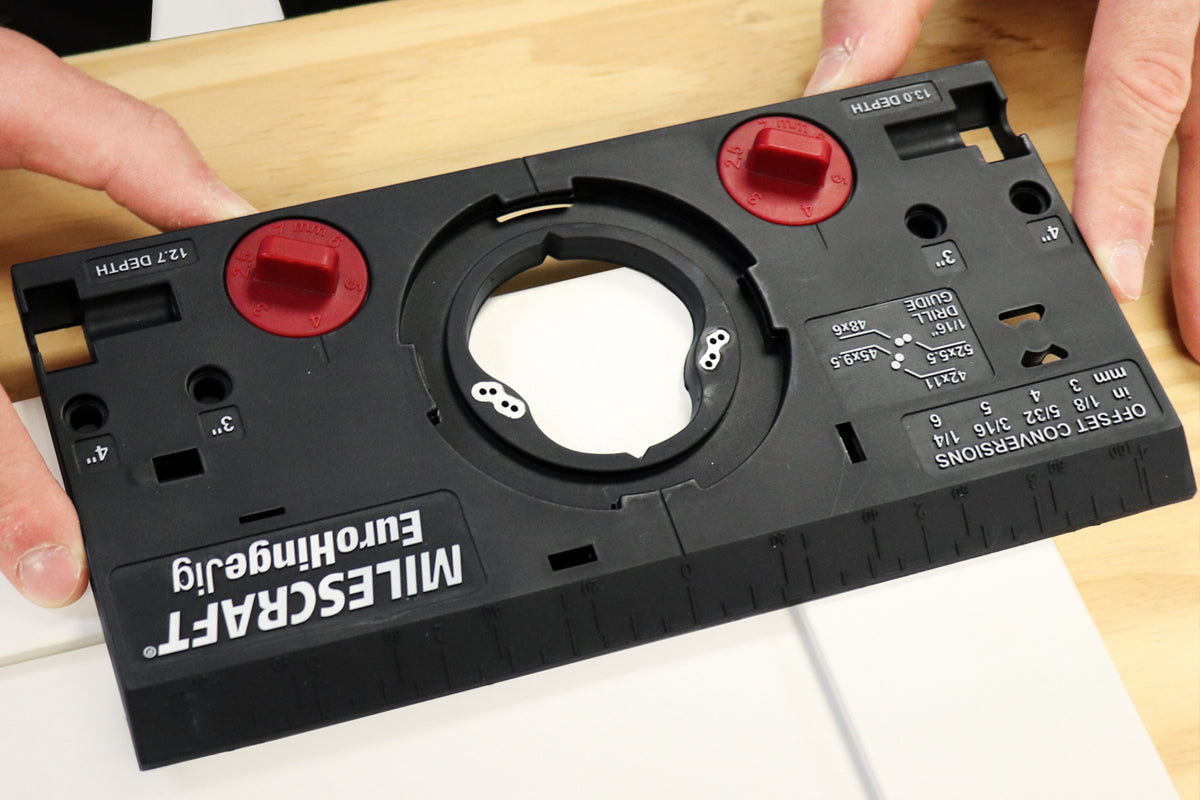
Anatomy of a hinge jig
All four of the jigs we tried rely on similar designs to ensure accurate drilling, with a guide that holds the bit vertically over the cup location, but they vary in setup and usage. The Milescraft, Kreg, and Veiko guides twist and lock into the base while the Rockler guide fits over a raised rim on the base that you hold in place by hand. Stop collars on the bit shank control boring depth, but only the Milescraft and Kreg jigs provide a way to set the depth without manually measuring the distance that the bit extends below the base.
In order to remain hidden, most of the hinge’s mechanism must tuck into the cup hole in the door stile. Precise placement allows it to both swing the door open as well as thrust it outward to clear the cabinet.
Milescraft provides a depth-stop groove in the base for setting the stop collar. Kreg uses a groove in the bit shank that the set screw aligns with to control boring depth.
Hinge manufacturers specify the distance of the 35mm cup hole from the edge of the door stile. Typically, this offset puts the edge of the hole 3mm to 6mm from the outside edge of the door.
The Kreg and Milescraft jigs have similar cams that fit against the side of the door and rotate to provide the correct offset. The Veiko jig features movable threaded pins to index the offset. Rockler achieves the offsets by mounting a metal plate to the base using screws in paired holes for 3, 4, or 5mm, along with a pair of slots that allow for variable offsets.
The vertical distance of the cup hole from the top and bottom of the door isn’t as critical—typically 3 to 4 inches. To position the jig vertically on the door stile, both the Milescraft and Kreg jigs have a molded-in measuring scale along one edge as well as a handy millimeter-to-inch conversion table.
The Milescraft and Veiko jigs use a movable pin to set the vertical position from the bottom and top of the door. To position the Rockler jig from the top or bottom of the door, you need to measure and mark the centerline of the cup hole on the door stile, then align the jig with your centerline mark.
Finally, the Rockler and Veiko jigs have built-in clamps that firmly held the jigs in place. The Milescraft and Kreg jigs require you to provide clamps.
Mounting screw guides
The location of the mounting screws varies depending on the hinge manufacturer’s specifications. The Milescraft and Veiko offer options for drilling pilot holes in four different spacing patterns. Milescraft builds them into the base while Veiko uses a separate plate that drops into the base. The Kreg jig has a single, fixed set of screw-hole guides which may or may not match your hinge specifications. Milescraft and Veiko include a 1∕16" drill bit for drilling the pilot holes.
Conclusions
While any of these jigs will do the job, we’d choose the Milescraft for our shop based on all its thoughtful features that also include a marking template for locating the mounting screw holes on the cabinet. This template stores conveniently onboard the base along with other accessories. It was also the lowest priced jig we considered.
Tips for hinge jig success
- Have hinges on hand and verify mounting position requirements before drilling
- Double-check edge offset settings
- Clamp the jig securely to the door and support the door on a stable work surface
- Start the drill and let it get to speed before touching the bit to wood
- Drill at a low speed and feed the bit slowly, backing out to clear chips as you go